Simulate individual eKYC approvals
Learn how to trigger specific eKYC statuses by submitting predetermined test data during the verification process. This guide helps you understand the end-to-end user journey for individual eKYC approvals and rejections in the staging environment.
Note:
This simulation guide applies exclusively to [SG] Partner-assisted KYC and [SG] Document-based Verification. Because [SG] Authentication-based verification relies on live third-party data retrieval, it does not use these document simulation steps.
These procedures are unsupported in Production and should only be performed in UAT or Staging.
Use Cases:
- You need to simulate an individual eKYC approval to test the success scenarios of your onboarding process.
- You need to simulate an individual eKYC rejection to test the negative scenarios of your onboarding process.
Prerequisites:
- You must already have a registered individual user that is ready to perform eKYC. Refer to the Perform individual eKYC section to learn about the specific required KYC criteria.
Approval Simulation Workflow
1
Generate a KYC capture link for the individual user
Simulating a KYC approval requires you to undergo the eKYC process. Render the eKYC capture link in any web/mobile browser that you want to conduct your test on.
Initiate KYC Capture (Individual User)
Call Initiate KYC Capture (Individual User) (POST /users/authentications/documents/verifications) to get the href or the redirect link to the eKYC web app. To redirect users back to your application after they complete or exit the eKYC flow, include the following callback parameters in your request.
Callback Parameters (eKYC capture screen back to your app)
redirect_url: The fully qualified callback URL to which the user is redirected upon exiting or completing the eKYC flow.redirect_mode: The method of redirection. Accepted values are auto (immediate redirection upon completion) or button (requires explicit user interaction to trigger the redirect).redirect_text: The custom label displayed on the redirection button (e.g., "Exit" or "Return"). Applicable only when redirect_mode is set to button.
Initiate KYC Capture (Individual User) request
curl --location --request POST 'https://{{identity_base_url}}/{{program_code}}/v2/users/authentications/documents/verifications' \
--header 'X-Auth-User-ID: {{user_id}}' \
--header 'Authorization: ••••••'
--header 'Content-Type: application/json' \
--data '{
    "verification_mode":"document_based",
    "redirect_url":"www.partner-callback.com",
    "redirect_mode": "button",
    "redirect_text": "Exit"
}'
Initiate KYC Capture (Individual User) response
{
    "id": "caa61227979e43fea38d2730c11e8667",
    "links": [
        {
            "href": "https://api-sg-sdk.matchmove-beta.com/v2/web/sdk?id=459b1daa8fd49e7071daa9bd429dc30432dc4039e7fd067669330db4f6e89320d65554474c2b4fdace25920a30599578fcf519de4e74d2db7167e3187c83eeeb8141916b5c800b9eb2ef7485182ef21046a8f71a045c8cf8839988519bd6bddacf06eb3dd0ad5f837d40b40fd5c6cbba246ae60d74b1925f913c4ac339cc6f095244c807189ab3bfaa61e55de1da2d029abe9ffd352c7727f8205e0b0bc7f5d75f9fe85ab14b568512e2dc2e7a1d403e52f0026e93d063b8e26f73985e5b3bd968a590d54f3b08be8a3f09744206a7916ea2aee896864871bdfc41ad223efe14b2e7b77b59ef8f0f7268f32e0b5e3b1d0de123fedf957d0353de5168c9ac9c17603b44358cda2cb7a43317sd9dd844de4de81ff951&user_id=&auth_token=",
            "method": "GET",
            "rel": "capture.sdk"
        }
    ],
    "sub_type": "individual",
    "type": "users",
    "verification_id": "vfc_29baeb0da5144c678c1adf7eic61381e",
    "verification_mode": "document_based"
}
2
Perform the eKYC process and submit pre-approved documents
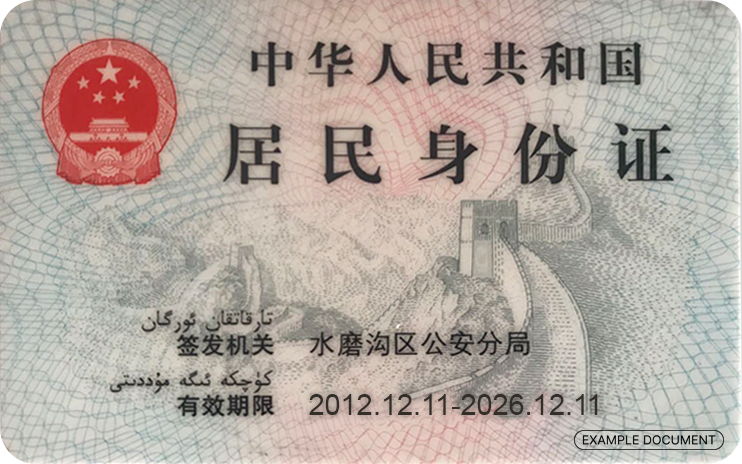
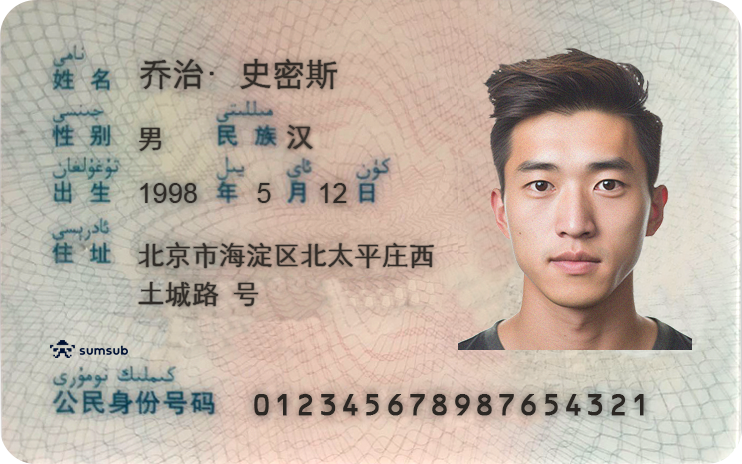
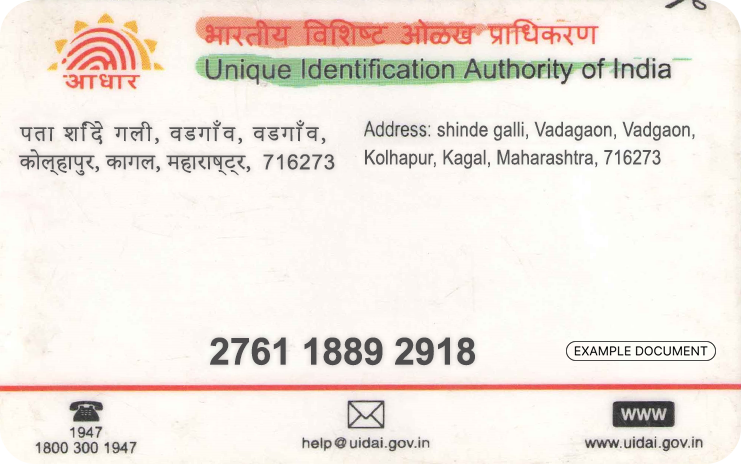
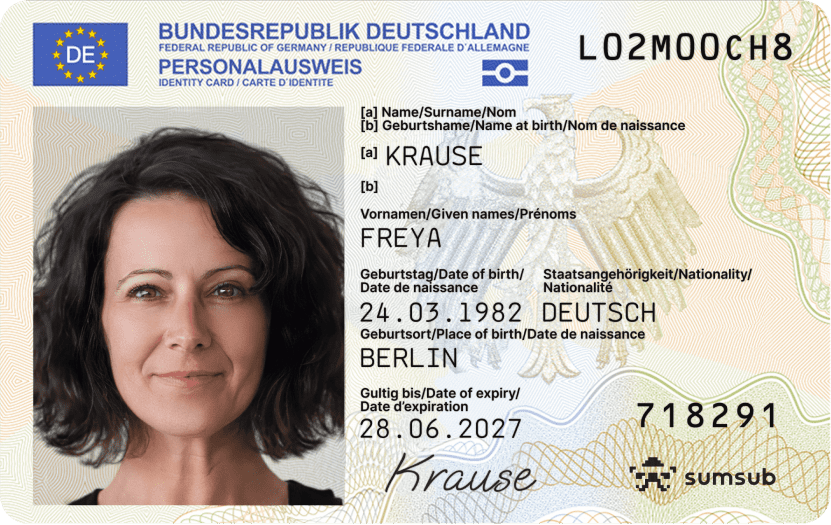
On the eKYC capture screens, you will be first asked to upload an identification document. You will need to upload any of these pre-approved identity documents.
These documents should allow you to get an approval, even if the registered user details do not align with the details in the identity documents.
You can subscribe to the KYC verification webhooks to be notified of the KYC approval of the individual user.
Pre-approved identity documents
ID card for China (front)
ID card for China (back)
ADHAAR for India (front)

ADHAAR for India (back)
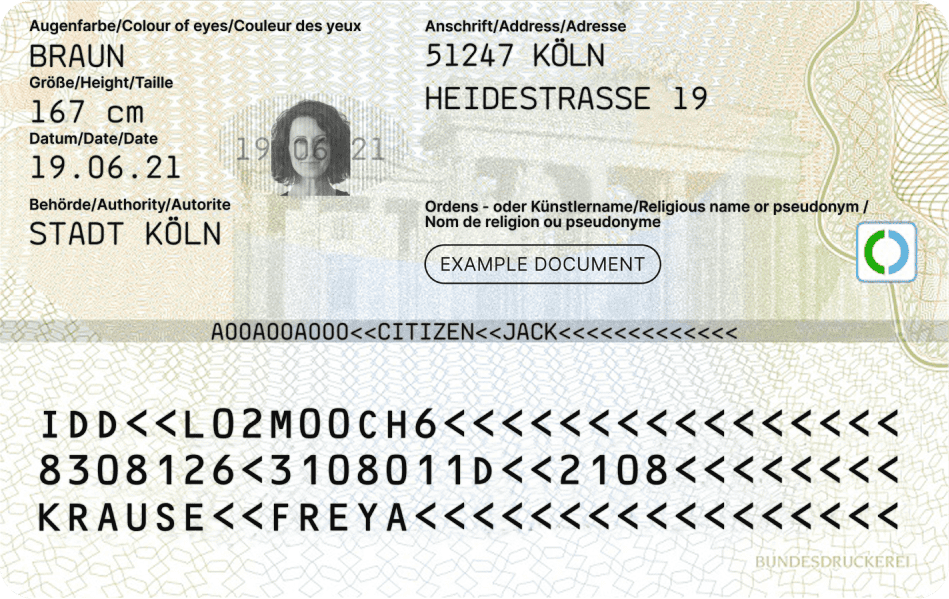
ID card for Germany (front)
ID card for Germany (back
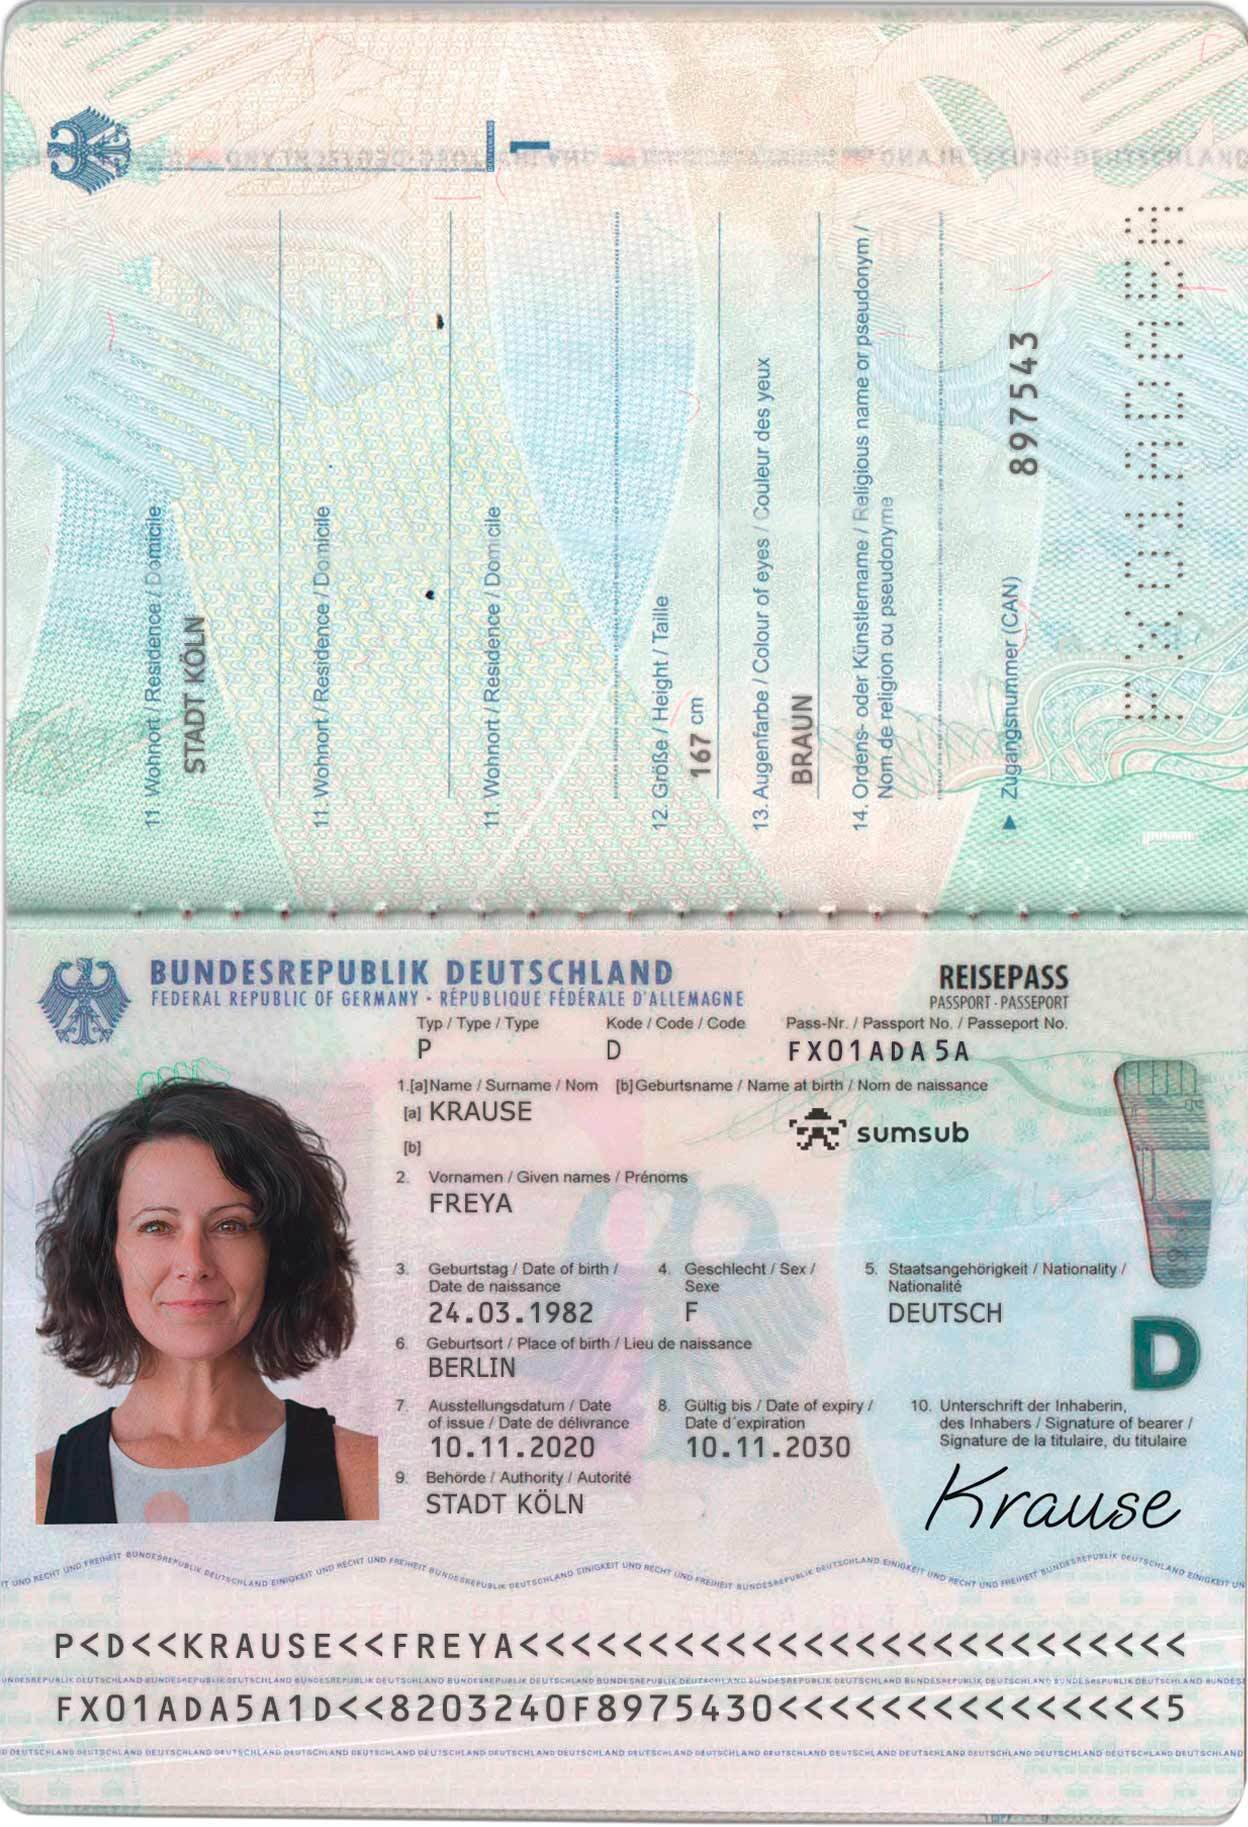
Passport for Germany
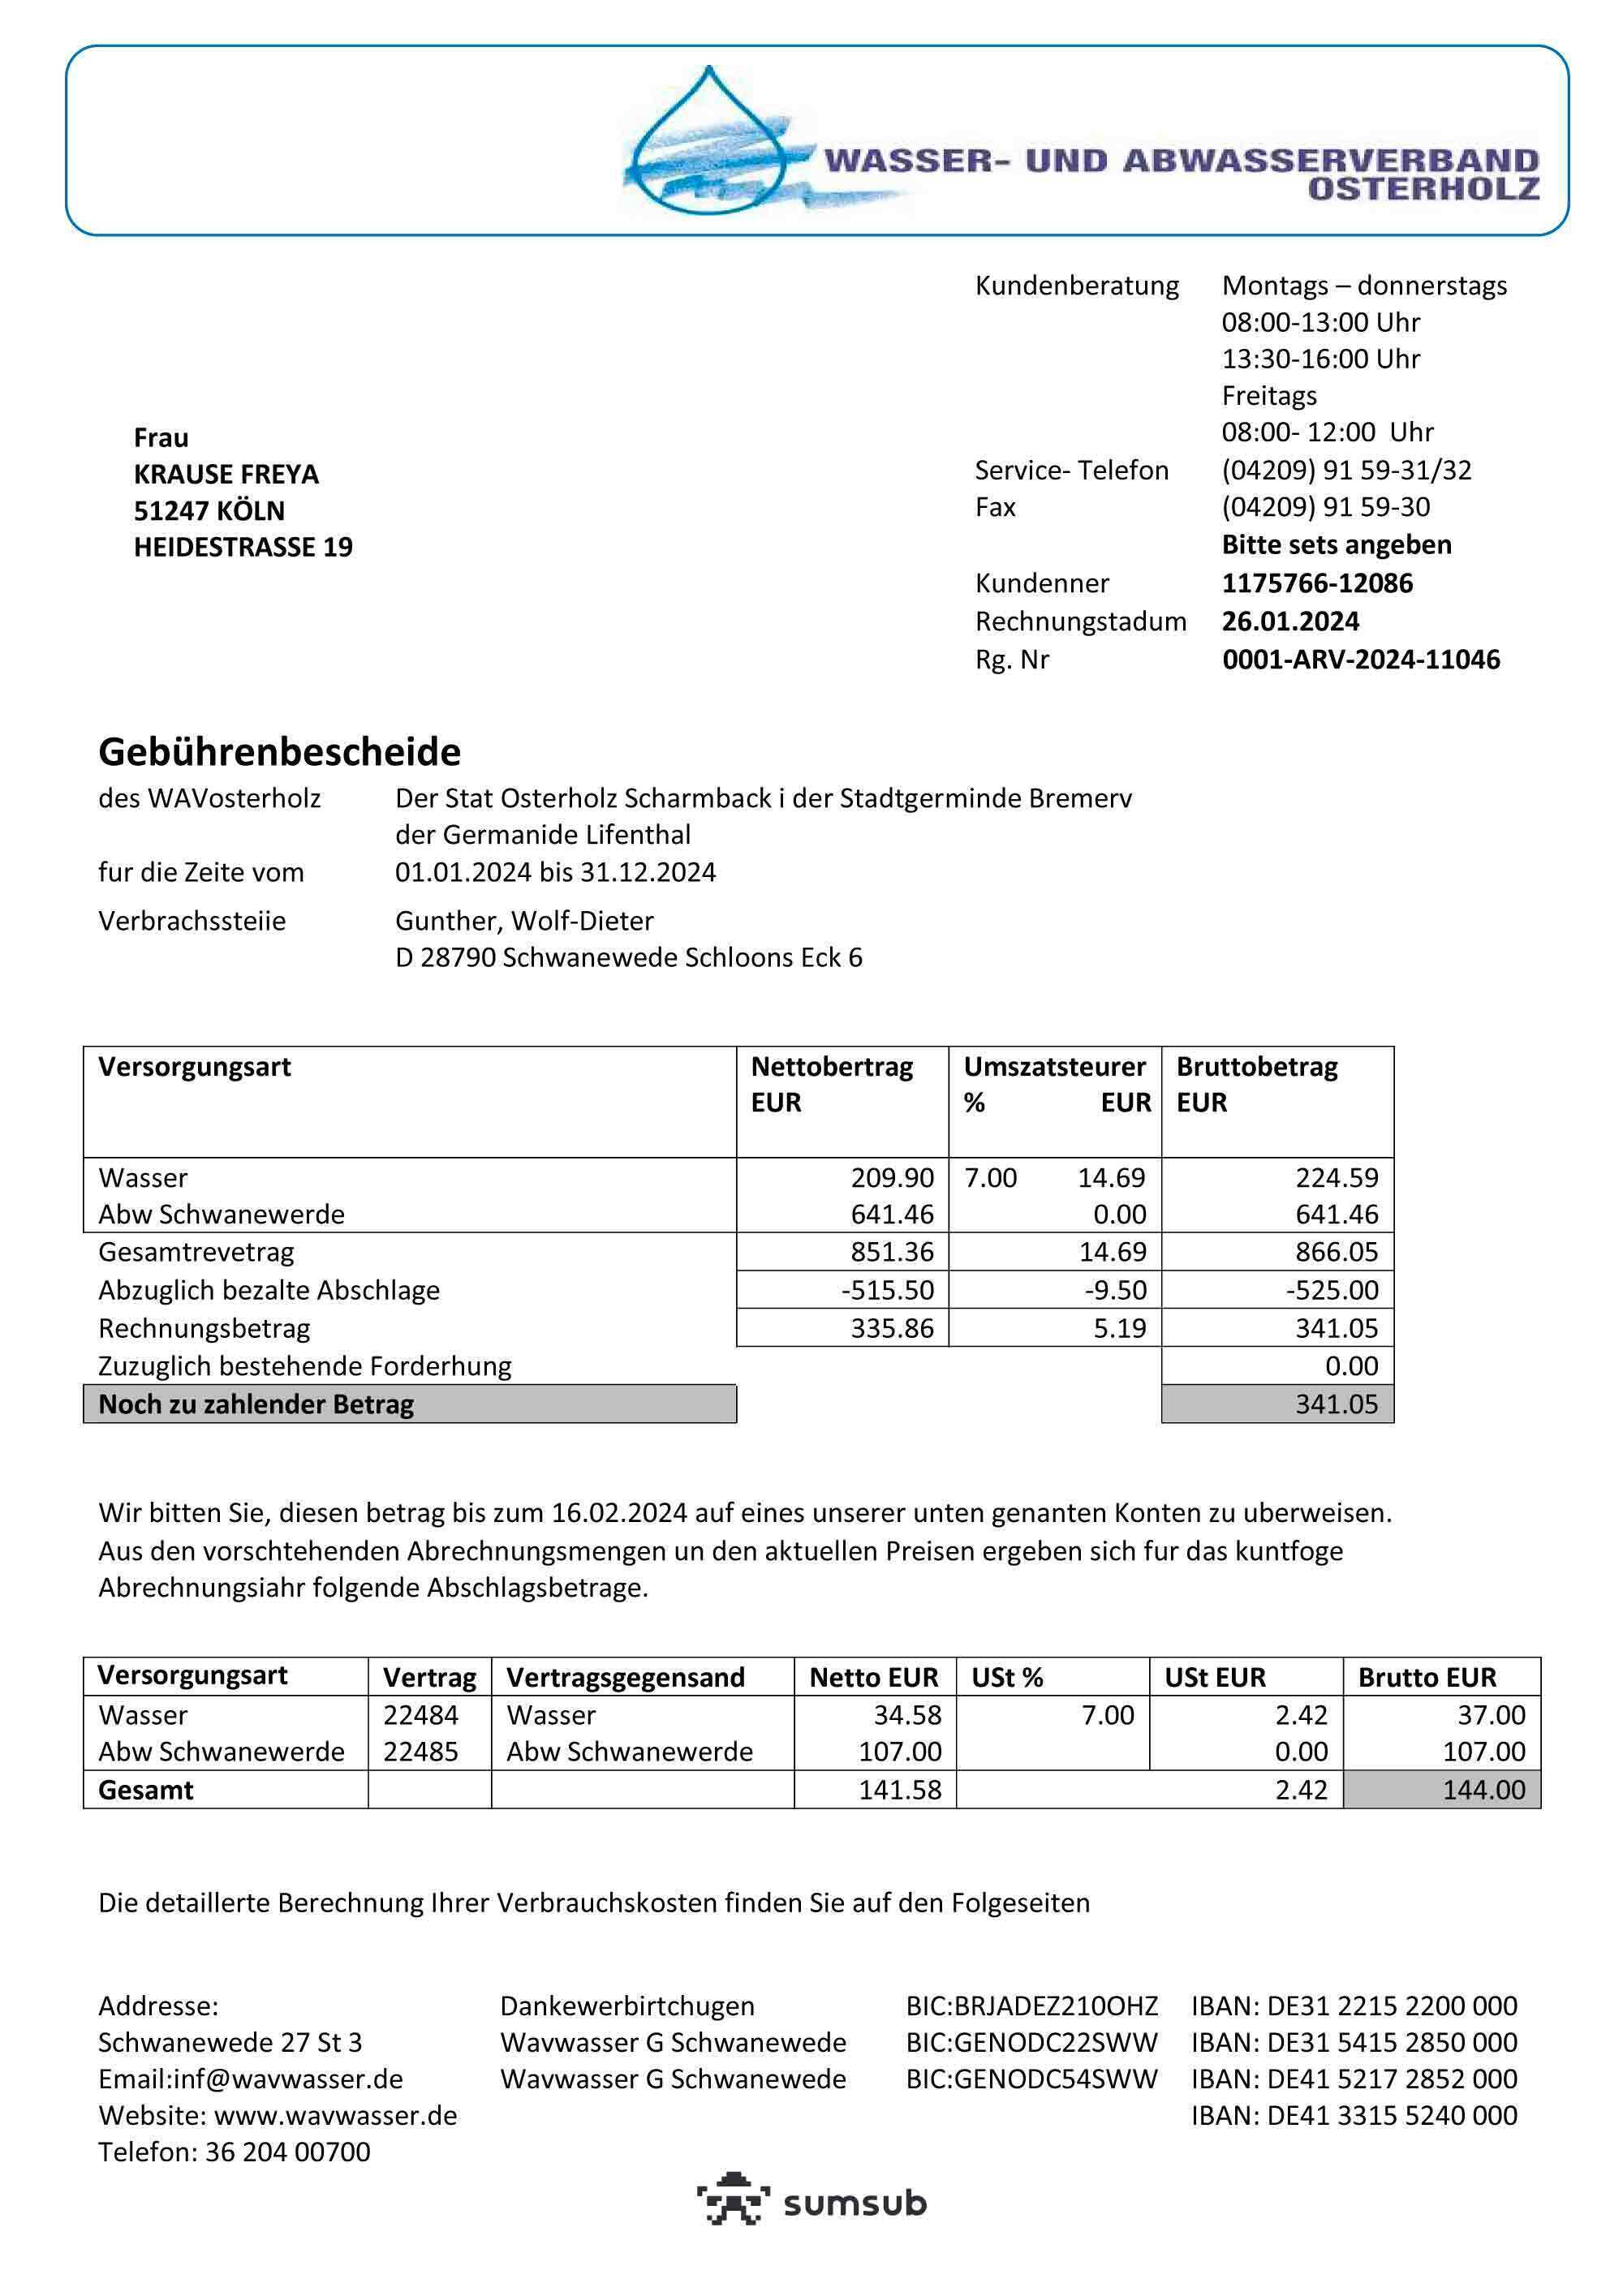
Proof of Address (PoA) for Germany
Source: https://docs.sumsub.com/docs/verification-document-templates
3
[EDD activated] Onboarding of high-risk users
If a user is flagged as "high-risk" (due to location* or profile), the system automatically triggers Enhanced Due Diligence (EDD). This adds extra screens and document requirements to their eKYC journey.
Note on Testing: You can use dummy data and documents for EDD requirements during simulation.
Please keep in mind that EDD flips the process from automated to manual review. Since MatchMove Compliance must personally vet these submissions in both staging and live environments, approval won't be immediate. In staging and for the purpose of simulation, we have established a 1-day SLA for these specific cases.
*Refer to Standard Operating Procedure for Compliance Management document for the list of high-risk and sanctioned regions.
4
[EDD activated] Complete KYC simulation for high-risk users
Since EDD requires a manual decision, a Freshdesk ticket is required to request an approval from the compliance team and complete the simulation process.
Please ensure you provide the following details in your ticket request:
- User ID
- Program Code
- Action required: APPROVE KYC
Rejection Simulation Workflow
1
Generate a KYC capture link for the user
Simulating a KYC approval requires you to undergo the eKYC process. Render the eKYC capture link in any web/mobile browser that you want to conduct your test on.
Initiate KYC Capture (Individual User)
Call Initiate KYC Capture (Individual User) (POST /users/authentications/documents/verifications) to get the href or the redirect link to the eKYC web app. To redirect users back to your application after they complete or exit the eKYC flow, include the following callback parameters in your request.
Callback Parameters (eKYC capture screen back to your app)
redirect_url: The fully qualified callback URL to which the user is redirected upon exiting or completing the eKYC flow.redirect_mode: The method of redirection. Accepted values are auto (immediate redirection upon completion) or button (requires explicit user interaction to trigger the redirect).redirect_text: The custom label displayed on the redirection button (e.g., "Exit" or "Return"). Applicable only when redirect_mode is set to button.
Initiate KYC Capture (Individual User) request
curl --location --request POST 'https://{{identity_base_url}}/{{program_code}}/v2/users/authentications/documents/verifications' \
--header 'X-Auth-User-ID: {{user_id}}' \
--header 'Authorization: ••••••'
--header 'Content-Type: application/json' \
--data '{
    "verification_mode":"document_based",
    "redirect_url":"www.partner-callback.com",
    "redirect_mode": "button",
    "redirect_text": "Exit"
}'
Initiate KYC Capture (Individual User) response
{
    "id": "caa61227979e43fea38d2730c11e8667",
    "links": [
        {
            "href": "https://api-sg-sdk.matchmove-beta.com/v2/web/sdk?id=459b1daa8fd49e7071daa9bd429dc30432dc4039e7fd067669330db4f6e89320d65554474c2b4fdace25920a30599578fcf519de4e74d2db7167e3187c83eeeb8141916b5c800b9eb2ef7485182ef21046a8f71a045c8cf8839988519bd6bddacf06eb3dd0ad5f837d40b40fd5c6cbba246ae60d74b1925f913c4ac339cc6f095244c807189ab3bfaa61e55de1da2d029abe9ffd352c7727f8205e0b0bc7f5d75f9fe85ab14b568512e2dc2e7a1d403e52f0026e93d063b8e26f73985e5b3bd968a590d54f3b08be8a3f09744206a7916ea2aee896864871bdfc41ad223efe14b2e7b77b59ef8f0f7268f32e0b5e3b1d0de123fedf957d0353de5168c9ac9c17603b44358cda2cb7a43317sd9dd844de4de81ff951&user_id=&auth_token=",
            "method": "GET",
            "rel": "capture.sdk"
        }
    ],
    "sub_type": "individual",
    "type": "users",
    "verification_id": "vfc_29baeb0da5144c678c1adf7eic61381e",
    "verification_mode": "document_based"
}
2
Perform the eKYC process and submit pre-rejected documents
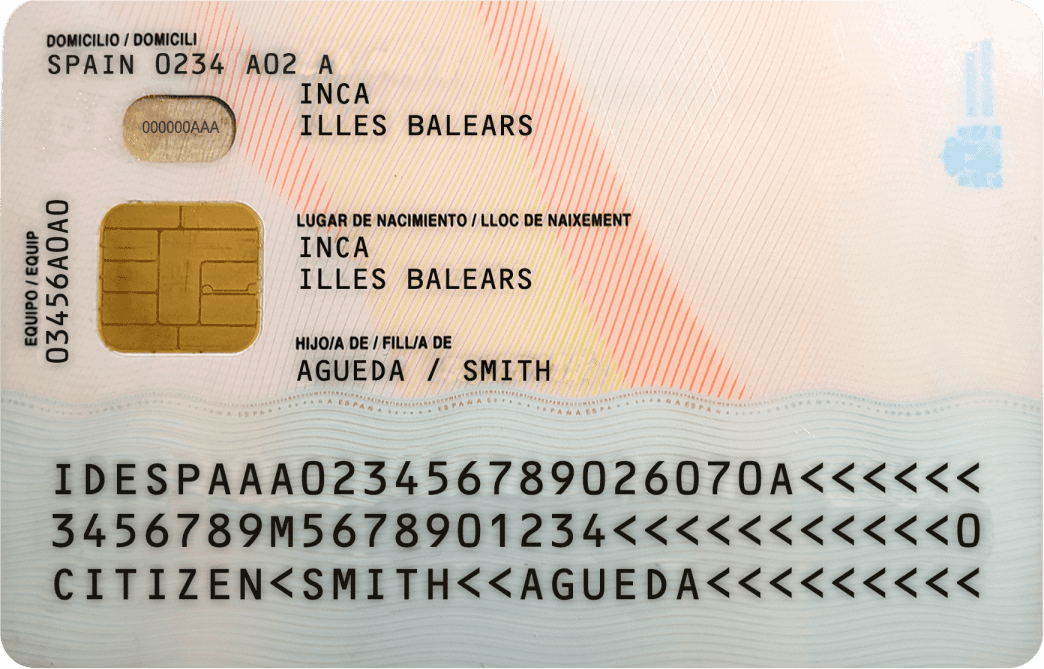
On the eKYC capture screens, you will be first asked to upload an identification document. You will need to upload any of these pre-rejected identity documents.
Submitting any or all these documents will guarantee rejection every time they are uploaded for a KYC submission.
You can subscribe to the KYC verification webhooks to be notified of the KYC document rejections of the individual user.
eKYC Rejection Workflow
For document-based verification, the documents uploaded in the eKYC capture screen will be subjected to the automated verification as soon as they are uploaded.
For partner-assisted verification, documents uploaded via the Create KYC documents API will be subjected to the automated verification as soon as the eKYC capture screen is loaded.
Since verification is done on-the-fly, the verification results, such as rejections and approvals, will also be given immediately (even if the user is still inside the eKYC capture screen).
When the verification results determine that the POI, or POA, or any other documents are invalid, the following will happen (in exact sequence):
- The platform will send a rejection webhook, notifying that a submitted document was rejected. This rejection webhook will have the following details:
user.kyc_status = completeduser.kyc_sub_status = rejecteduser.status = pending_activationuser.sub_status = document_verification_failed
- To allow the user to resubmit while still inside the eKYC capture screen, the platform will update the KYC status and send a user update webhook with the following details:
user.kyc_status = pendinguser.kyc_sub_status = pending_document_submissionuser.status = pending_activationuser.sub_status = document_verification_failed
- If the user is still in the eKYC capture screen, he will be presented with the document resubmission screen again to resolve the document requirement.
- If the user has already terminated the eKYC session, he should be able to request a new eKYC capture link from the partner app and resume the resubmission.
Refer to KYC and Individual User State Transition Updates for more details on the sequence of events and required actions in the KYC workflow.
By flagging rejected documents right away, users can upload their corrections on the spot without waiting for another round of background checks. This proactive approach also minimizes the likelihood of a user submitting valid documents, only to discover a rejection later in the process.
Pre-rejected identity documents
Choose the rejection scenario that you want to simulate:
Rejected - Standard (No EDD) --> Document rejection and resubmission allowed
Rejected - Standard (No EDD) --> Document rejection and resubmission allowed
National ID card for ESP (front)
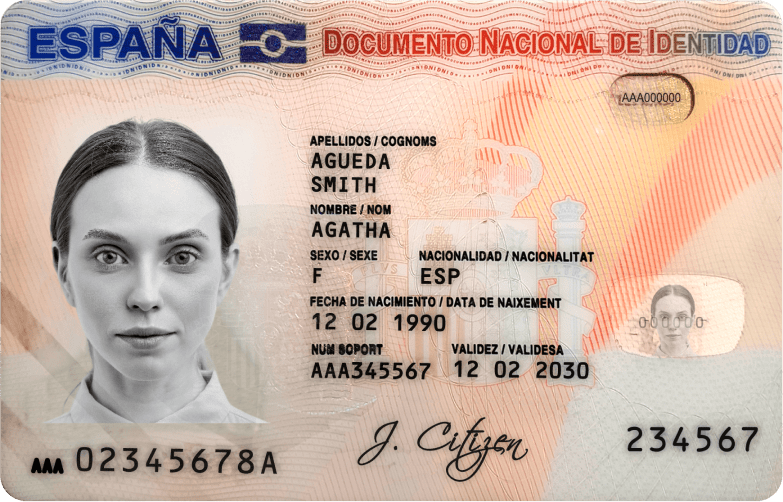
National ID card for ESP (back)
Proof of Address (PoA) for Germany
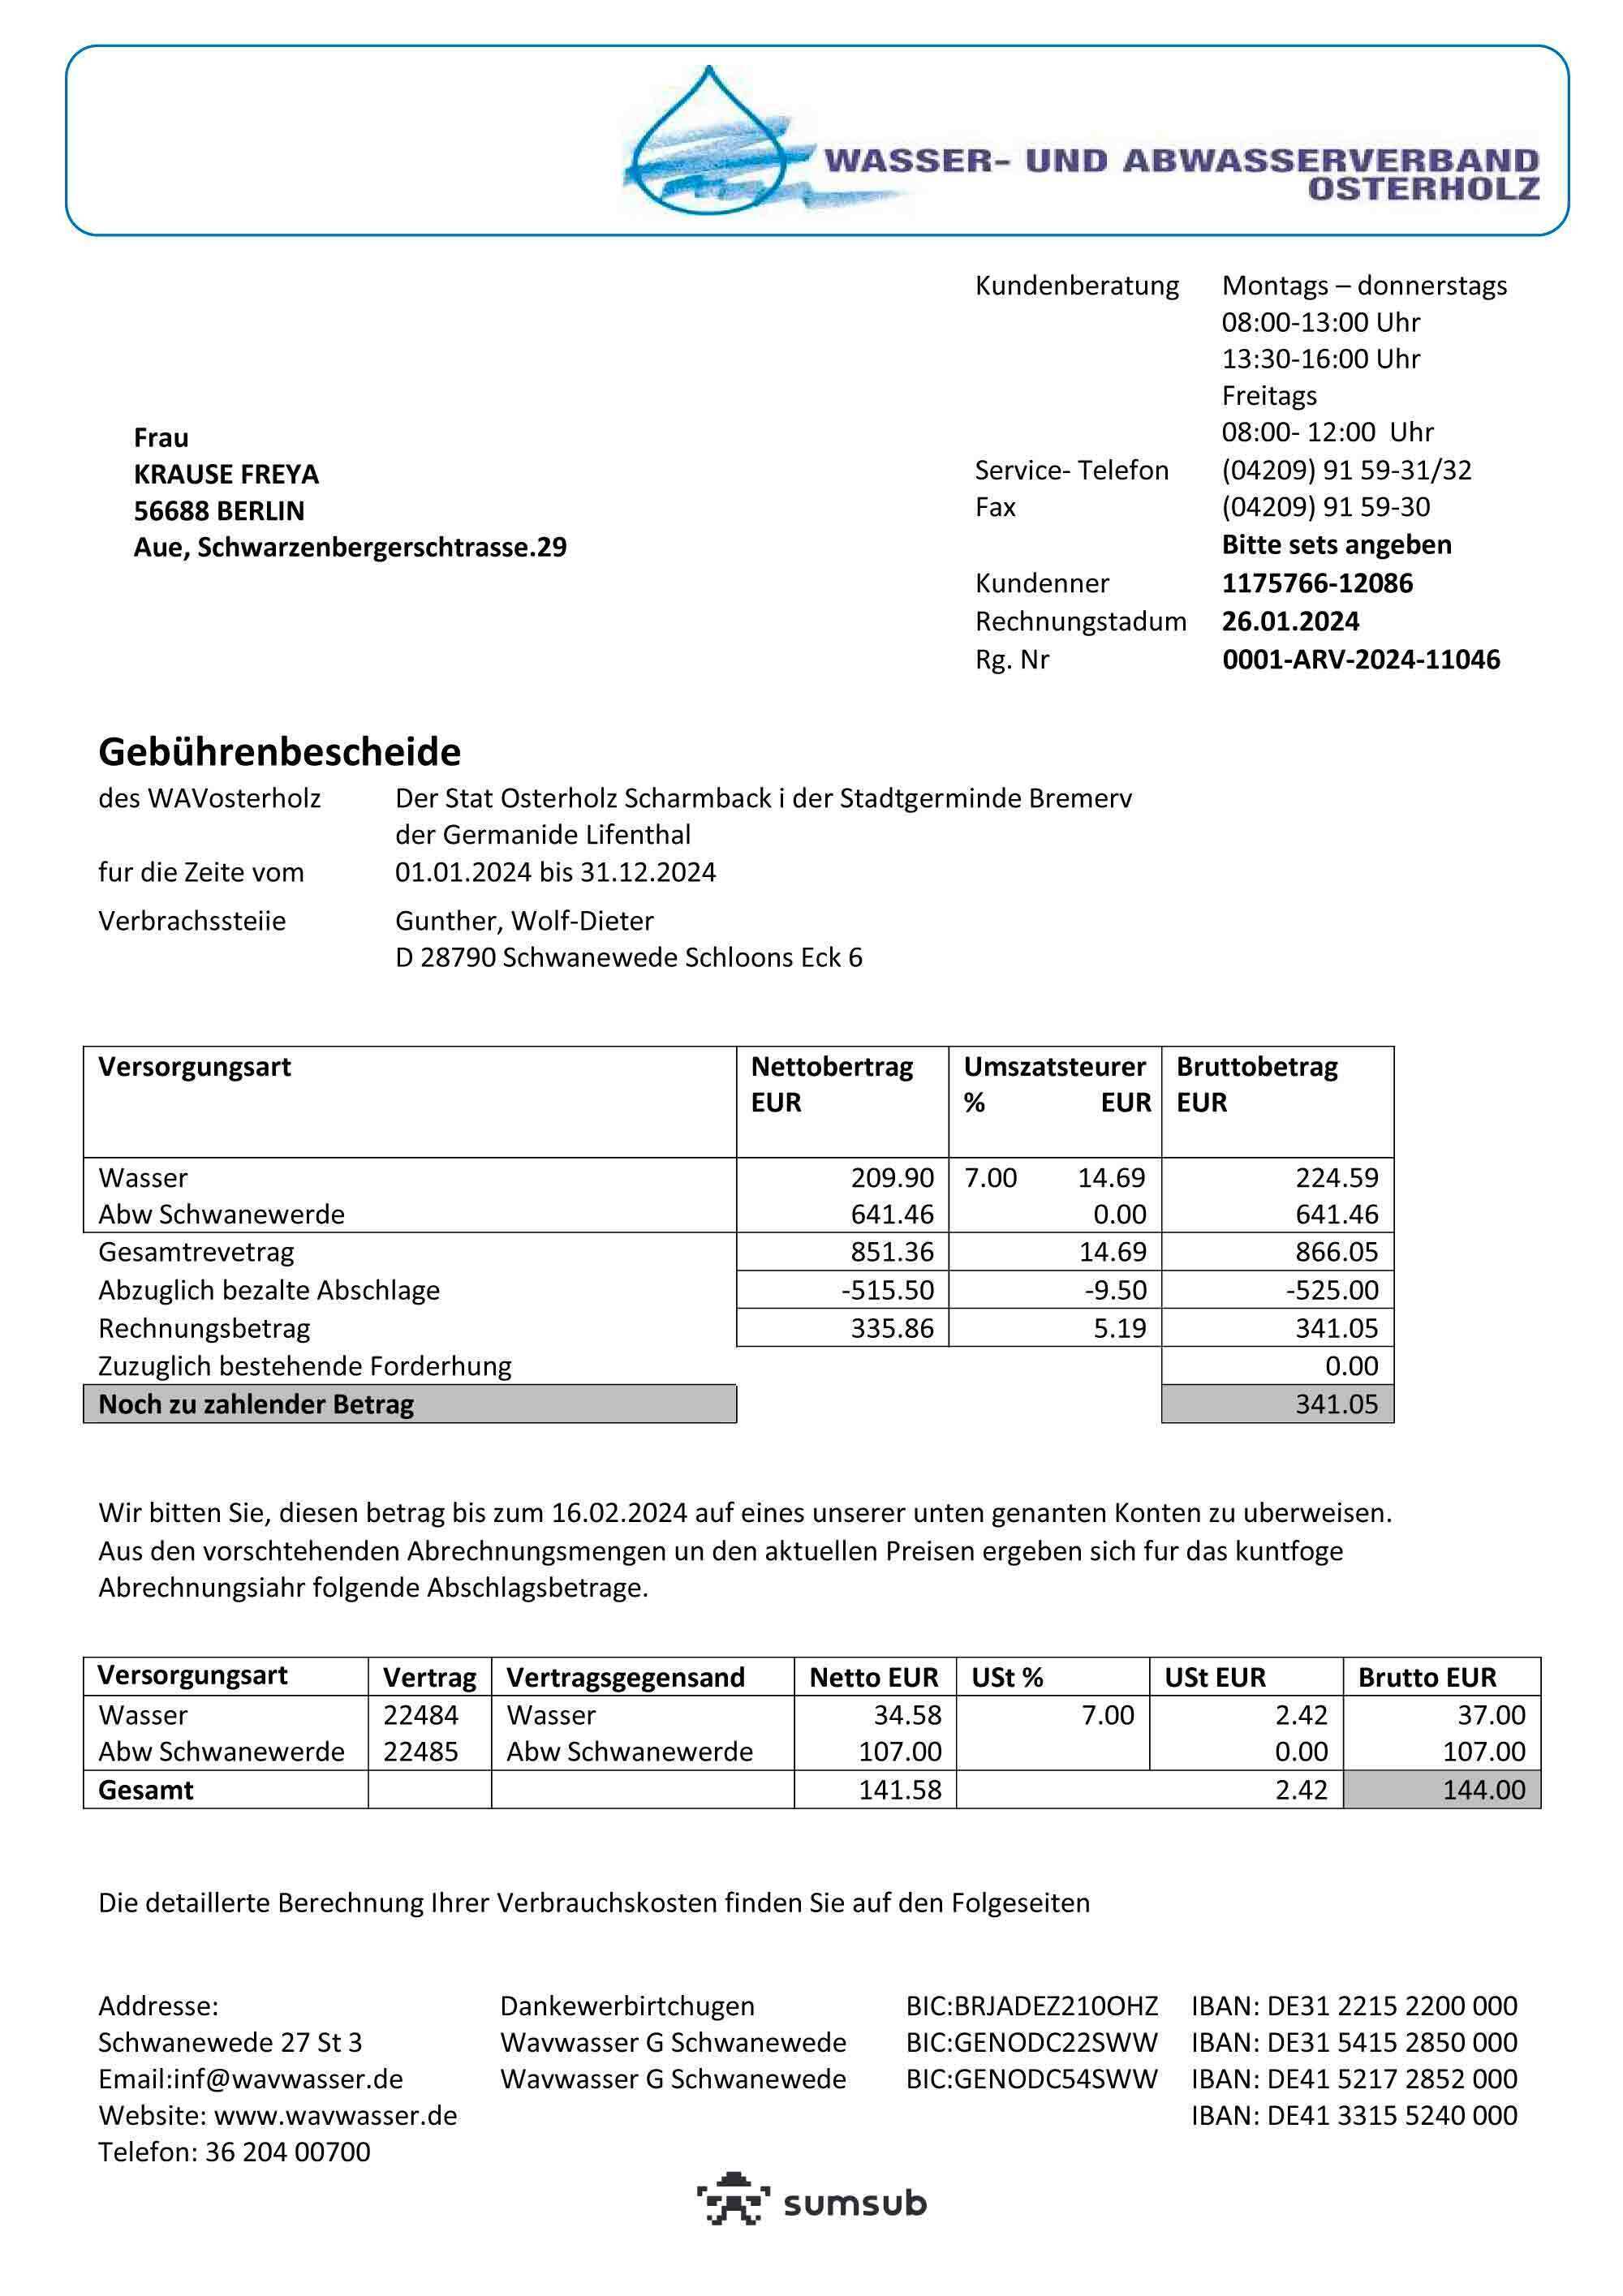
Rejected - Standard (no EDD) - Prohibited Residency (US POA) --> Document rejection and with no resubmission allowed
Rejected - Standard (no EDD) - Prohibited Residency (US POA) --> Document rejection and with no resubmission allowed
National ID card for CYP (front)
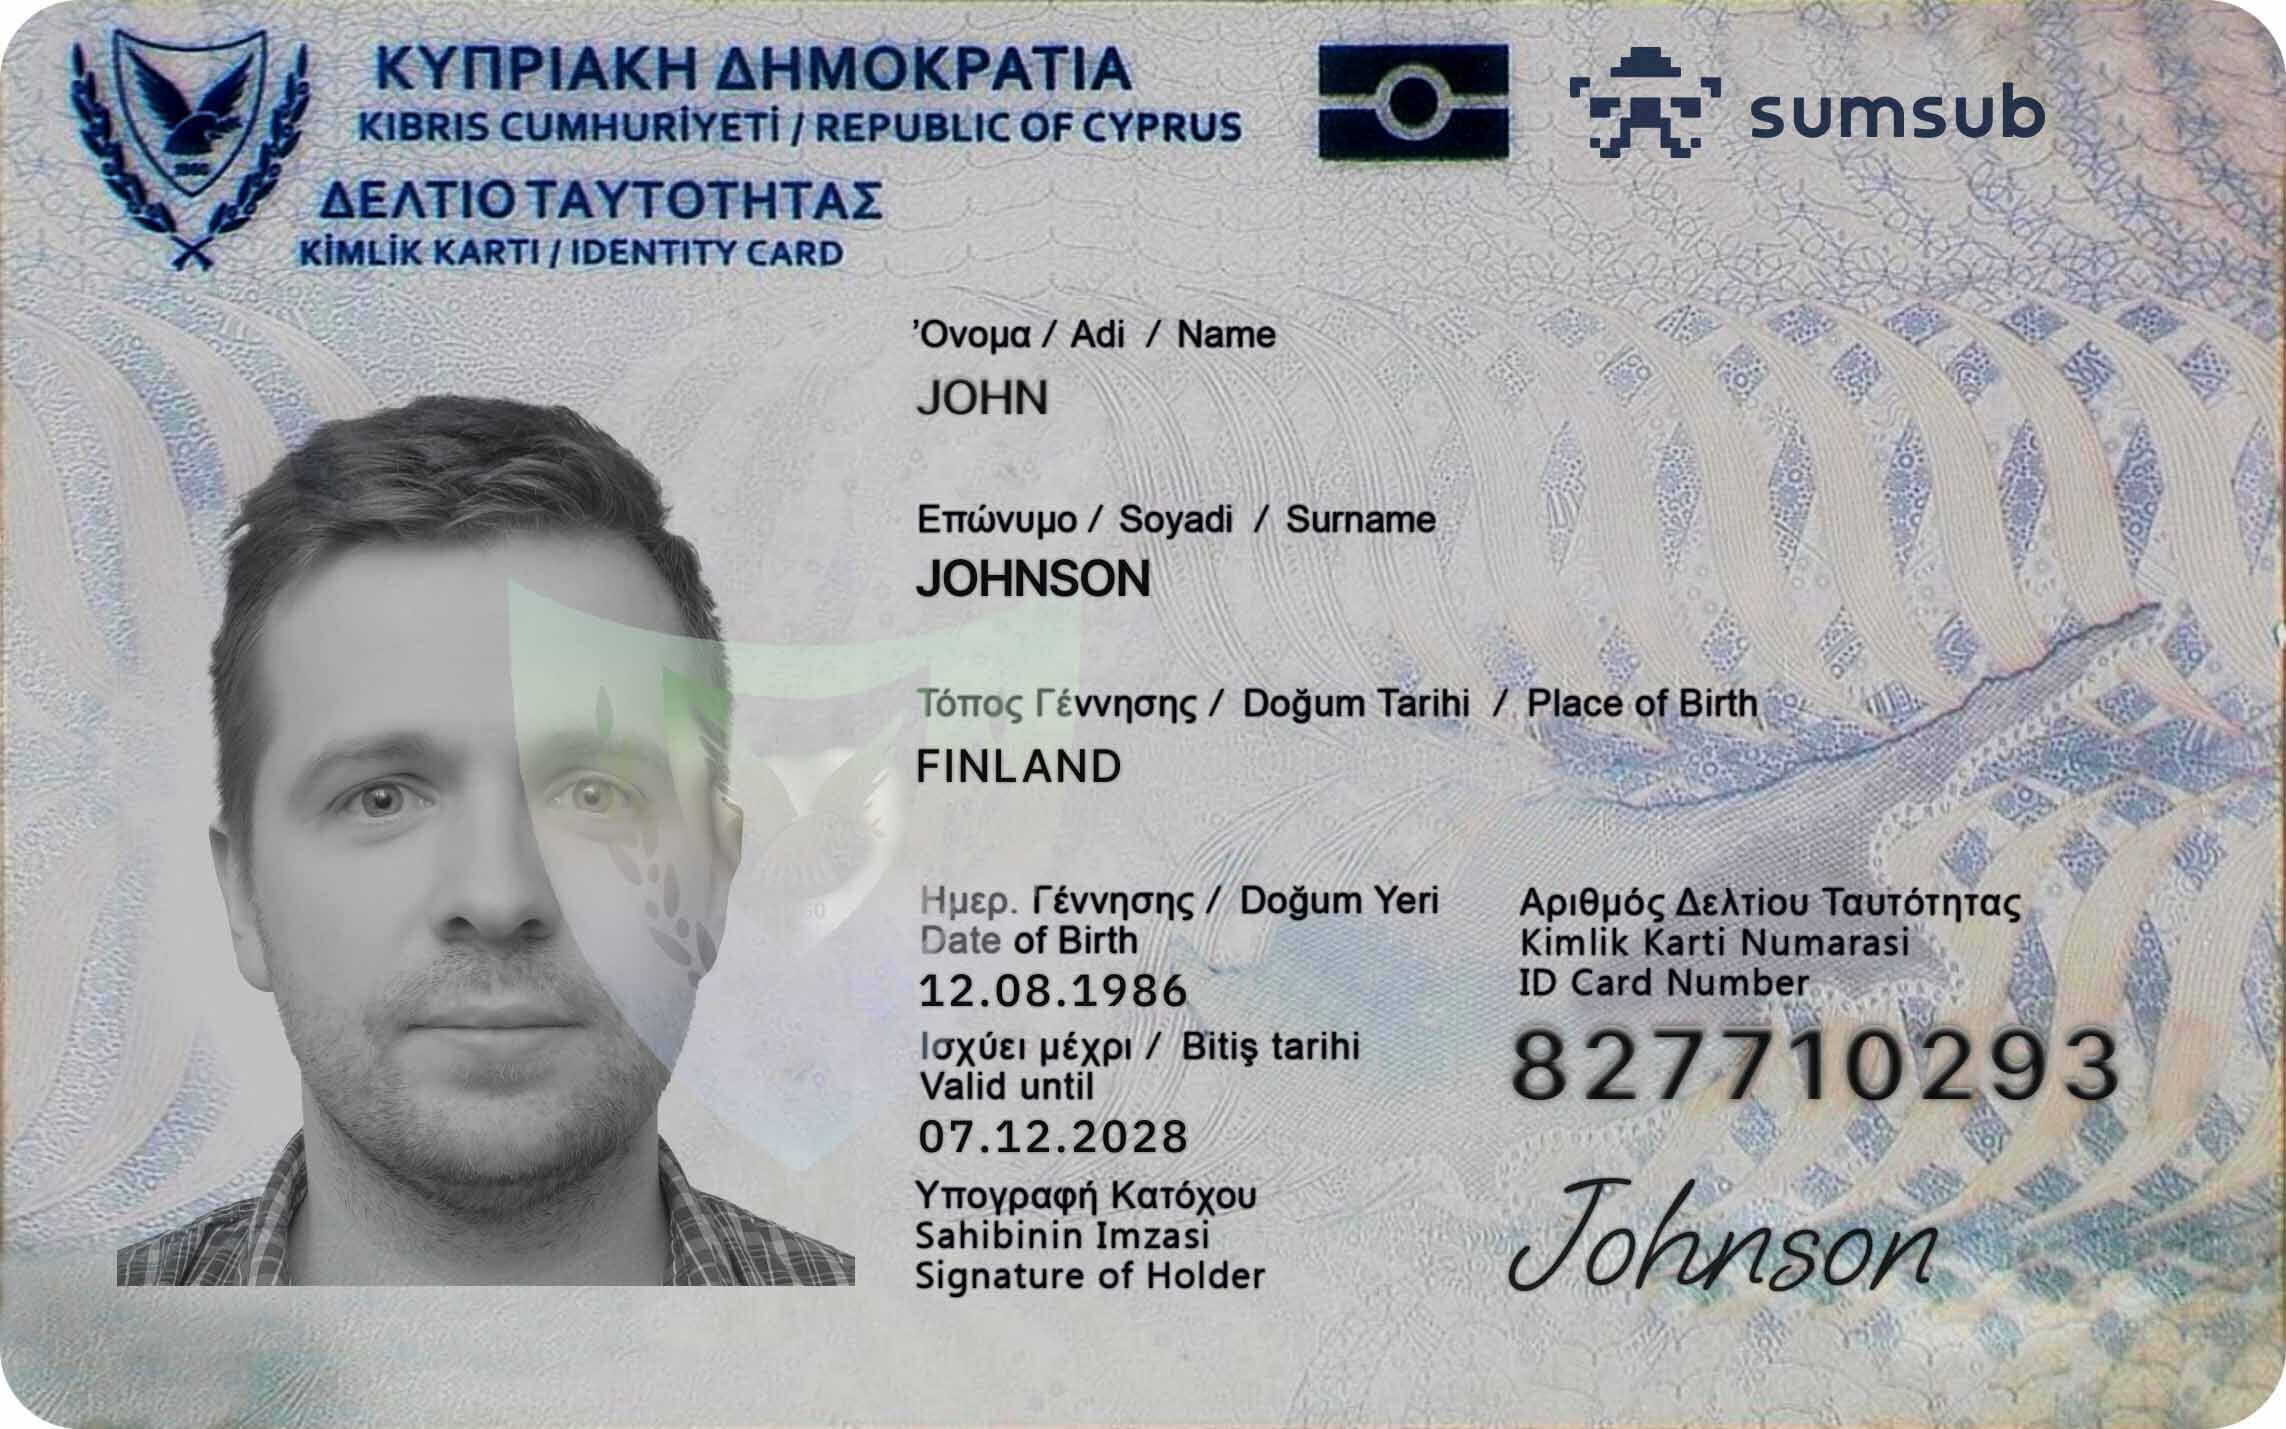
National ID card for ESP (back)
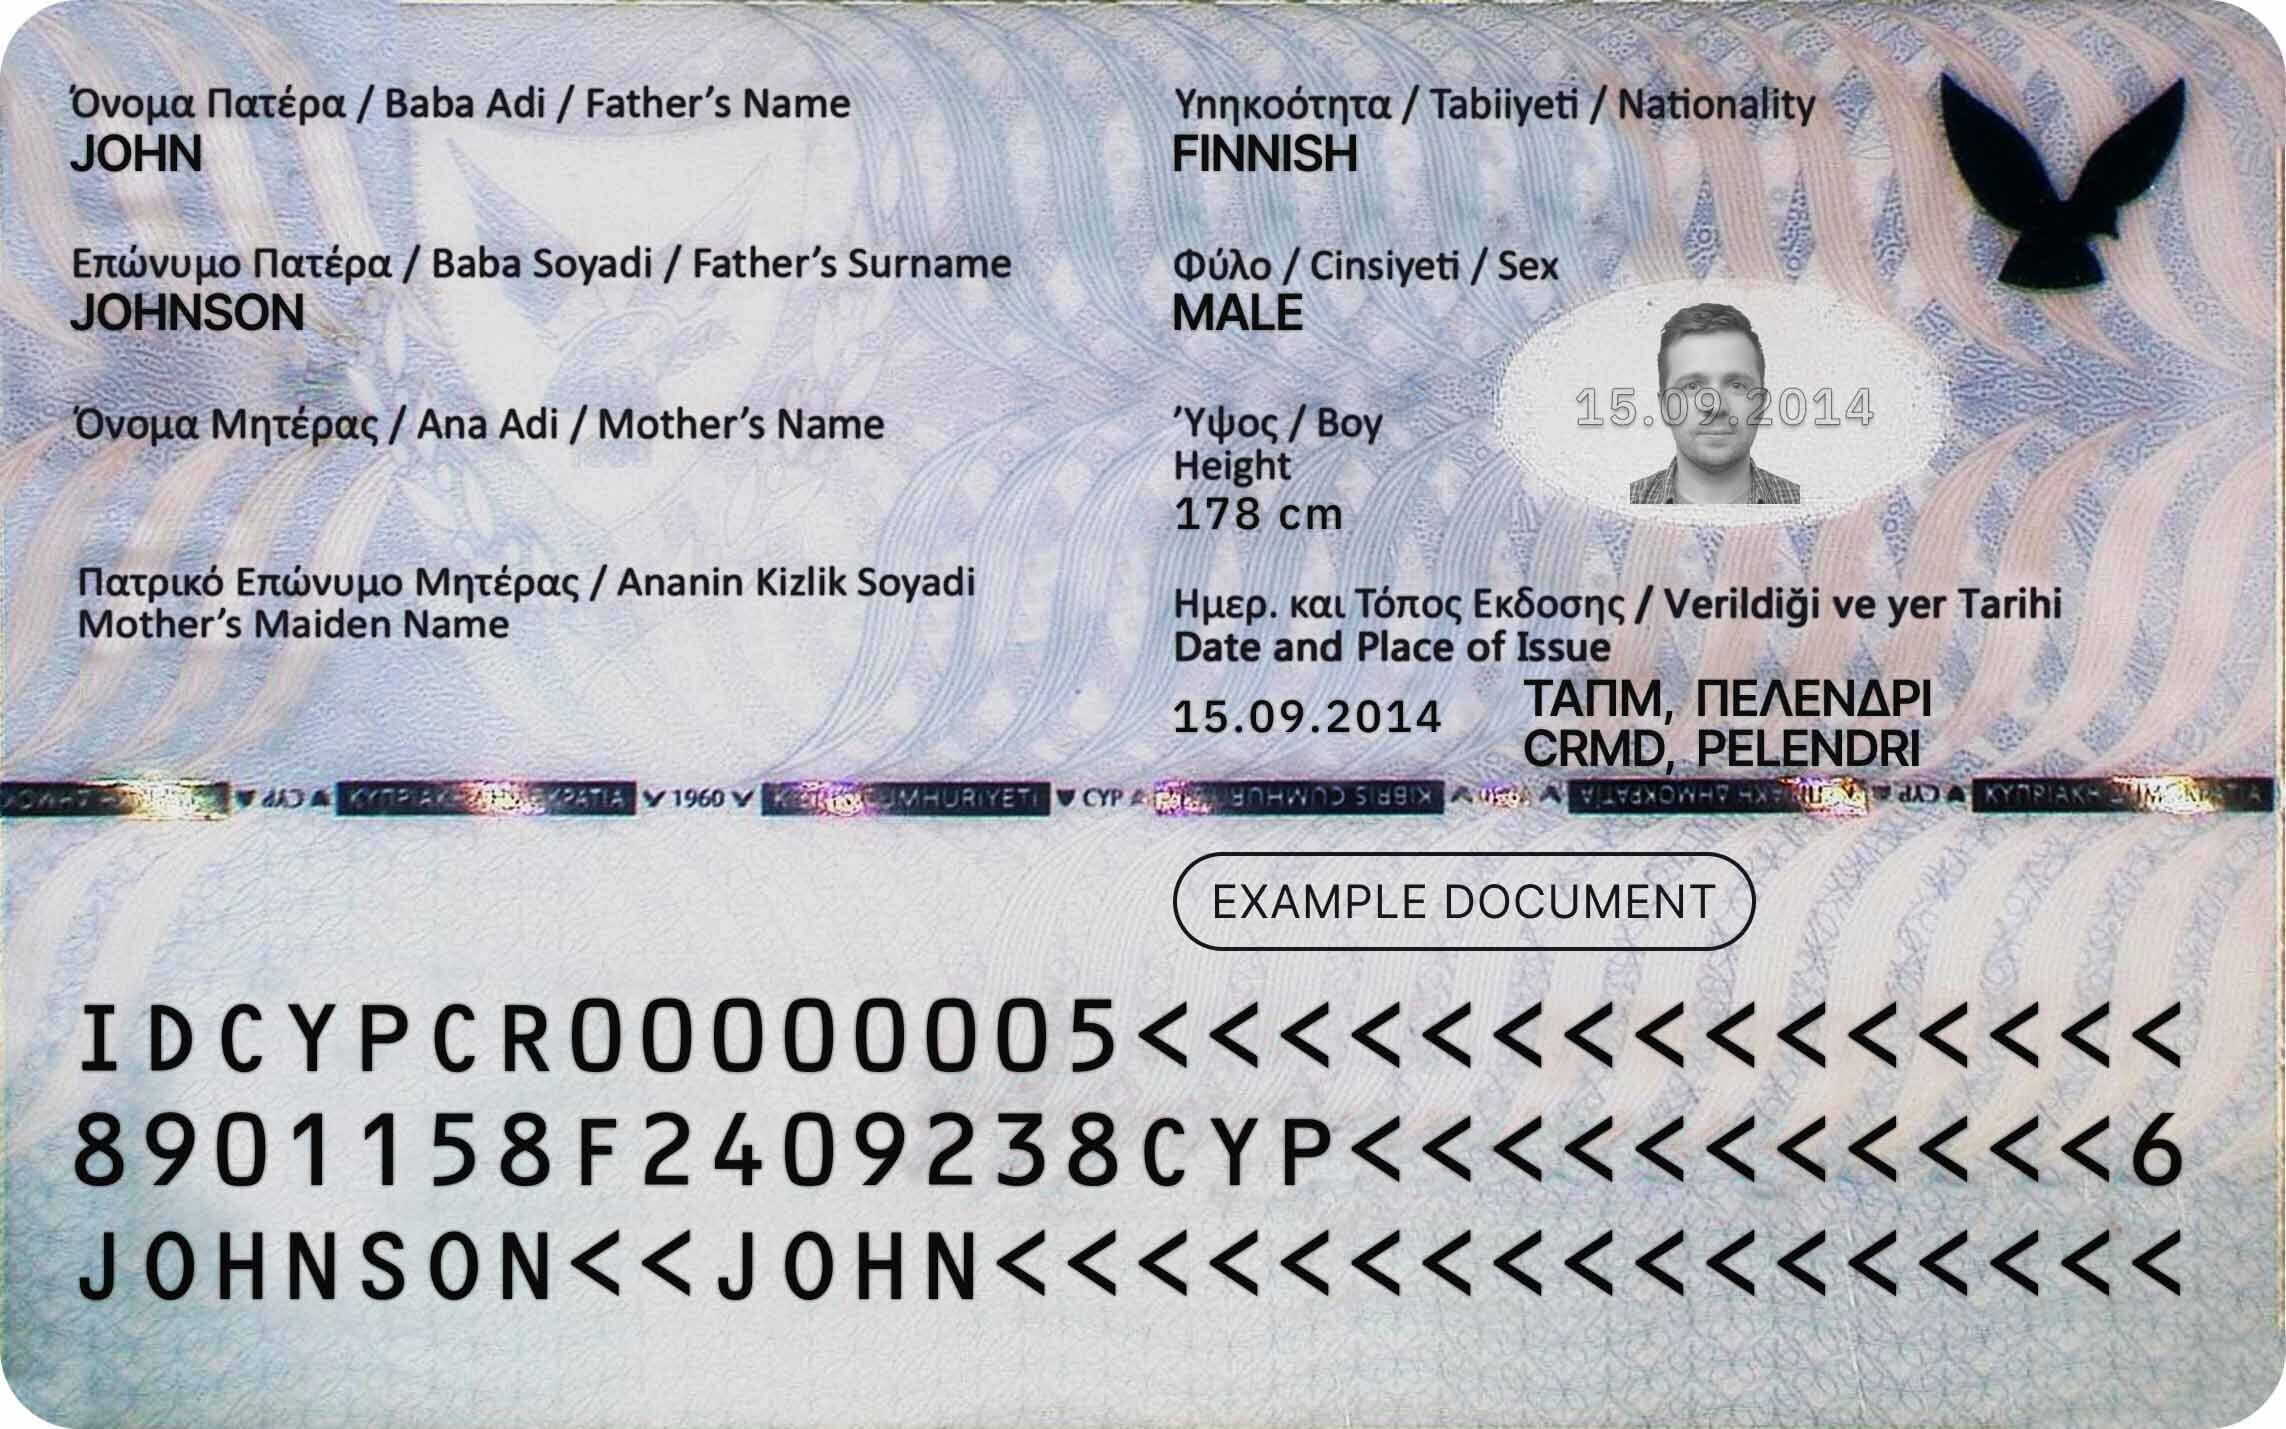
Proof of Address (PoA) for USA
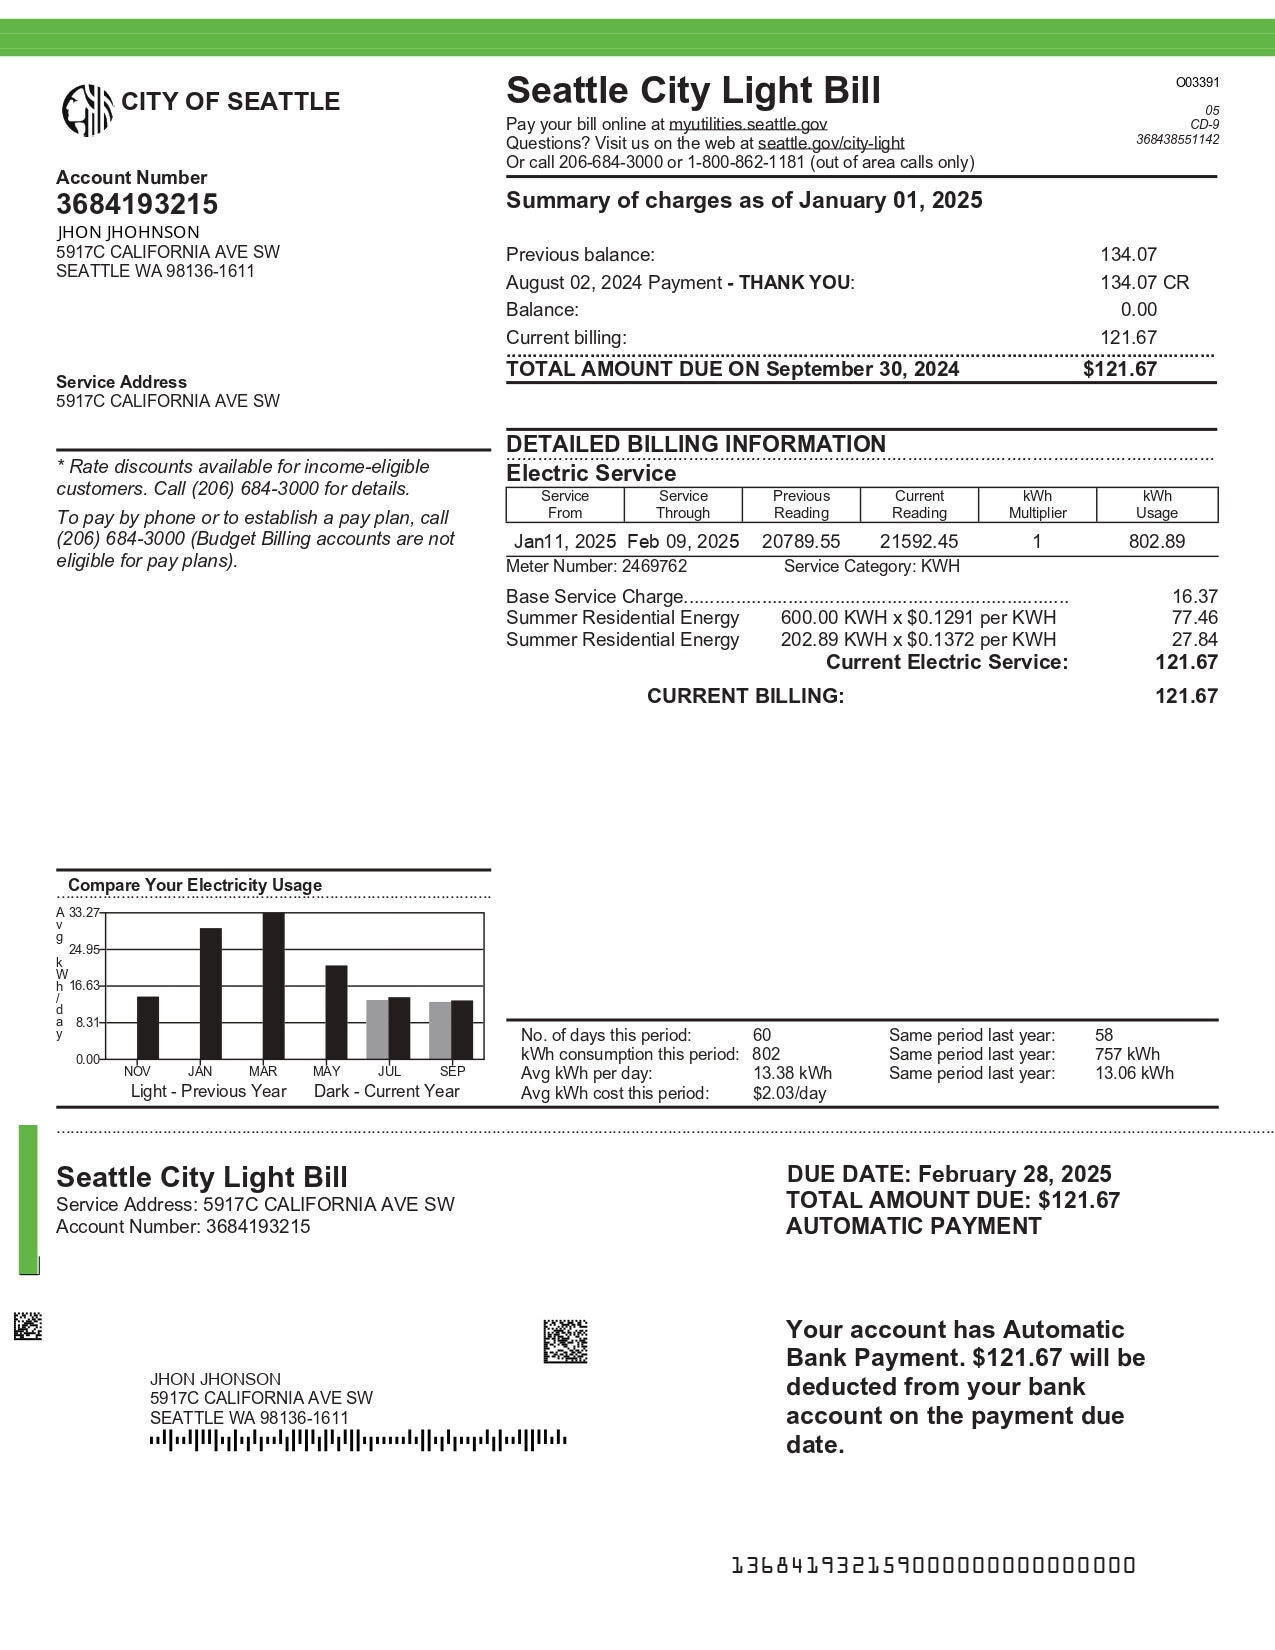
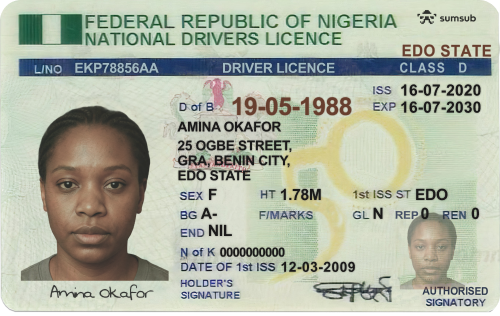
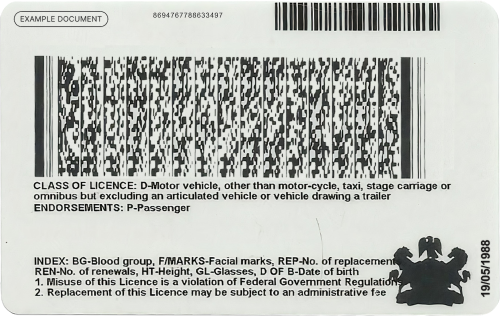
Rejected - EDD - High-Risk Users (Nigeria POI and POA) --> EDD questionnaire and a Freshdesk ticket for rejection required
Rejected - EDD - High-Risk Users (Nigeria POI and POA) --> EDD questionnaire and a Freshdesk ticket for rejection required
Driver's License ID card for NGA (front)
Driver's License ID card for NGA (back)
3
[EDD activated] Complete KYC simulation for high-risk users
Additional requirement to complete: Rejected - EDD activated - Compliance rejection simulation scenario
Since EDD requires a manual decision, a Freshdesk ticket is required to request a KYC rejection from the compliance team and complete the simulation process.
Please ensure you provide the following details in your ticket request:
- User ID
- Program Code
- Action required: REJECT KYC
On this page
- Simulate individual eKYC approvals